To convert WAV to MP3, decode the uncompressed PCM audio in the WAV file and re-encode it with an MP3 encoder (almost always LAME) at a bitrate you choose. With ffmpeg that is one line:
ffmpeg -i input.wav -c:a libmp3lame -b:a 192k output.mp3
That command works, and for most files you can stop there. The rest of this guide covers the choices hidden inside it: which bitrate is worth the space, when variable bitrate beats constant, and the things the conversion changes without printing a single warning. A 96 kHz file comes out at 48 kHz. The LFE channel of a 5.1 mix disappears. Loud masters gain clipped samples. Notes in your WAV's metadata ride along into a file you're about to share.
Every number below comes from running ffmpeg 8.1 (with LAME) on a public-domain Musopen recording of Mozart's Figaro overture (4:01, stereo) and on synthetic test files built for specific edge cases. They are single-file measurements, so treat them as worked examples rather than averages: other recordings will land at different sizes and peaks.
How to convert WAV to MP3
You can convert WAV to MP3 with a single ffmpeg command, a desktop app, or an online converter. All three run the same kind of encoder; they differ in which settings they expose and where your audio goes.
ffmpeg (Windows, macOS, Linux). Install it from ffmpeg.org or your package manager (brew install ffmpeg, sudo apt install ffmpeg, winget install Gyan.FFmpeg), then pick one:
# Constant bitrate: predictable size, maximum compatibility
ffmpeg -i input.wav -c:a libmp3lame -b:a 192k output.mp3

# Variable bitrate: best quality per byte for music
ffmpeg -i input.wav -c:a libmp3lame -q:a 2 output.mp3
If you leave out -b:a and -q:a entirely, ffmpeg 8.1 encodes at 128 kbps constant bitrate. That's fine for speech and on the low side for music.
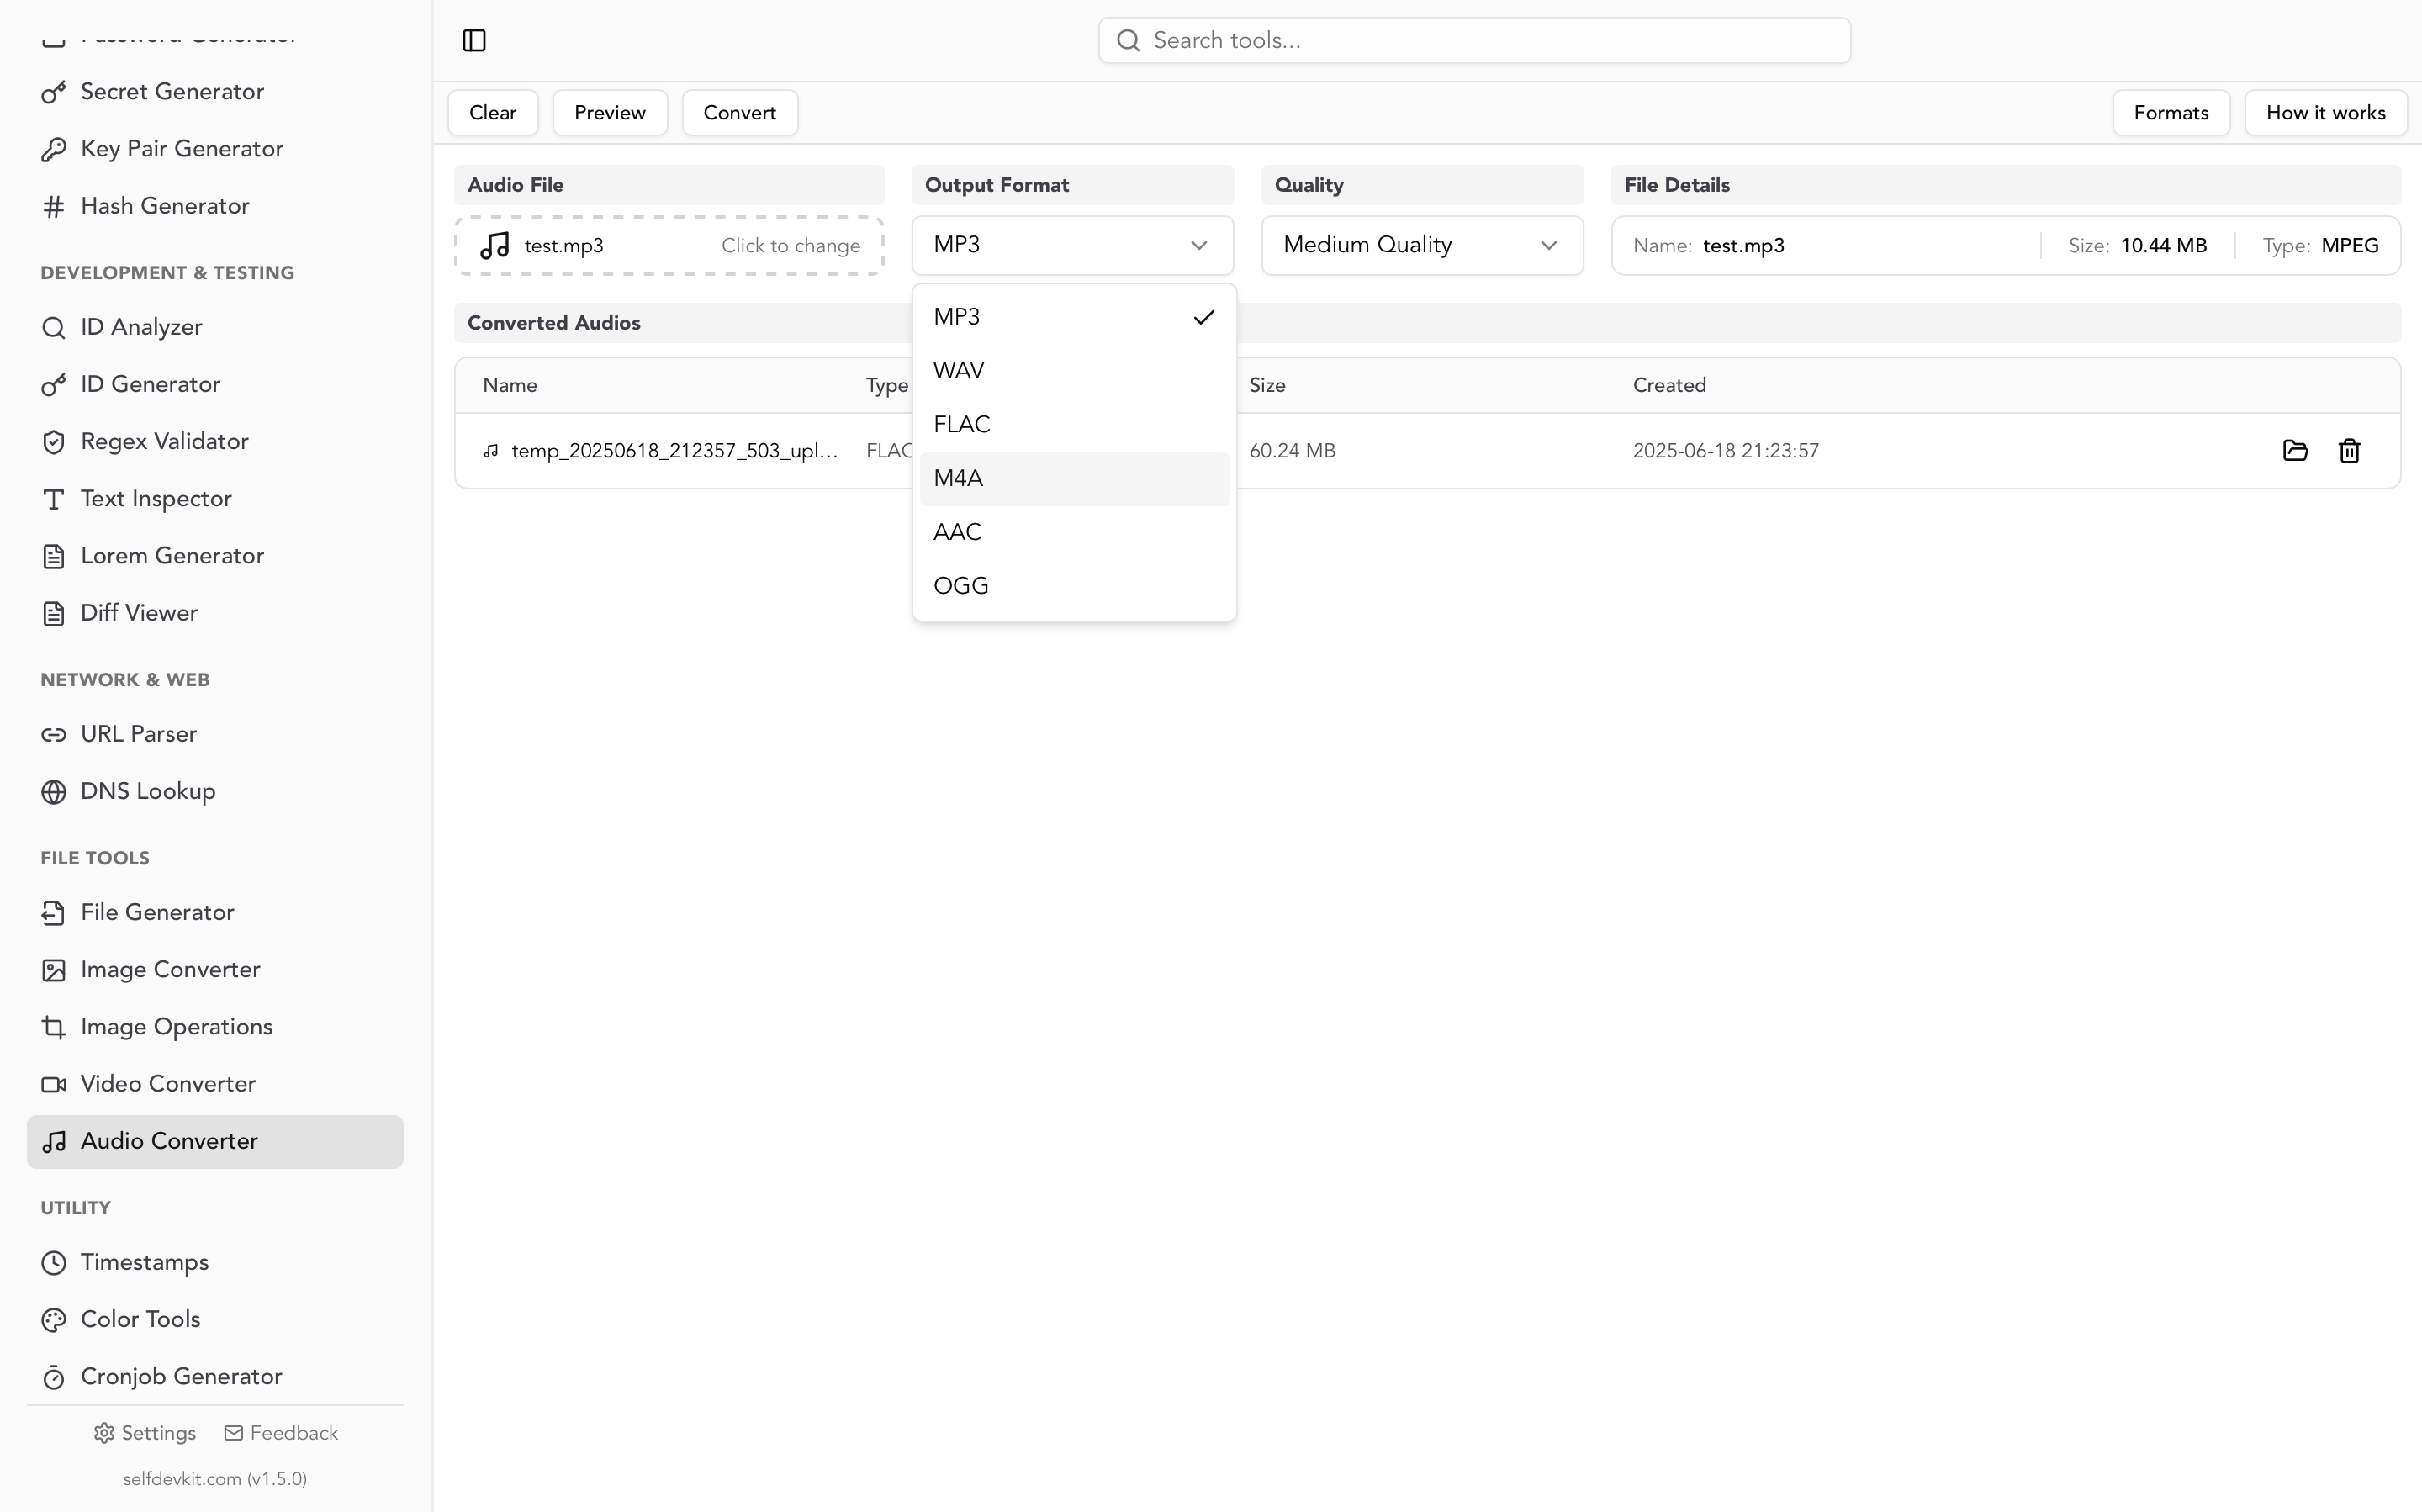
SelfDevKit. Open Audio Converter, click the file box to select your WAV, set Output Format to MP3, pick a quality, and click Convert. High is 320 kbps, Medium is 192 kbps, and Low is 128 kbps, all constant bitrate through the same LAME encoder ffmpeg uses. The converted file appears in a list below, with a button to reveal it in your file manager.
Online converters usually upload the file and convert it on a server. Fine for a song, a poor fit for interviews and unreleased music (see below).
Which MP3 bitrate should you use?
Use 192 kbps or VBR -q:a 2 for music, 320 kbps when the MP3 is the only copy you'll keep, and 64 to 96 kbps mono for speech. Here is what each setting produced from the same 4-minute, 42.5 MB CD-quality WAV (44.1 kHz, 16-bit, stereo):
| Setting | ffmpeg flags | Average bitrate | File size | Smaller than WAV by |
|---|---|---|---|---|
| WAV source | (PCM 16-bit) | 1,411 kbps | 42.5 MB | (baseline) |
| CBR 320 | -b:a 320k |
320 kbps | 9.64 MB | 4.4x |
| CBR 256 | -b:a 256k |
256 kbps | 7.71 MB | 5.5x |
| VBR V0 | -q:a 0 |
252 kbps | 7.60 MB | 5.6x |
| CBR 192 | -b:a 192k |
192 kbps | 5.79 MB | 7.3x |
| VBR V2 | -q:a 2 |
185 kbps | 5.58 MB | 7.6x |
| VBR V4 | -q:a 4 |
144 kbps | 4.34 MB | 9.8x |
| CBR 128 | -b:a 128k |
128 kbps | 3.86 MB | 11.0x |
The constant bitrate rows are pure arithmetic: bitrate times duration. A CD-quality WAV is 44,100 samples per second × 16 bits × 2 channels = 1,411.2 kbps, roughly 10.6 MB per minute. A 192 kbps MP3 is about 1.4 MB per minute regardless of what's in it.
The VBR rows depend on the music. Quiet, sparse passages need fewer bits, so the encoder spends less there and more on dense passages. A heavily compressed pop track would land higher than this orchestral recording at the same -q:a value.
CBR or VBR?
Use VBR for music you'll listen to and CBR when something downstream needs a predictable bitrate. The Hydrogenaudio LAME page recommends the VBR presets -V 0 to -V 3 for high quality "with best file size", with CBR 320 as the alternative, and in the table above V2 came in smaller than CBR 192.
CBR still earns its place when a podcast host or broadcast system asks for it, or when you need file size to be a formula instead of a guess. In ffmpeg, -q:a maps to LAME's -V scale, from 0 (best) to 9 (smallest).
Mono speech is the other easy win. A 60-second mono WAV encoded with -b:a 192k came out at 192 kbps, the same budget a stereo music track gets, spent on one channel of voice. For podcasts and voice notes, -ac 1 -b:a 64k is plenty.
What a WAV to MP3 conversion changes silently
A WAV to MP3 conversion can resample, downmix, and drop channels without an error or a warning, because the MP3 format can't hold what some WAV files contain. ffmpeg quietly negotiates the closest thing MP3 supports. Every case below exited with code 0 and printed no warning.
Sample rate: anything above 48 kHz is resampled
MP3 tops out at 48 kHz. The LAME encoder in ffmpeg accepts only 8, 11.025, 12, 16, 22.05, 24, 32, 44.1, and 48 kHz, which you can confirm with ffmpeg -h encoder=libmp3lame. Studio WAVs are often recorded higher:
| WAV input | MP3 output (no -ar given) |
|---|---|
| 44.1 kHz | 44.1 kHz |
| 48 kHz | 48 kHz |
| 88.2 kHz | 48 kHz |
| 96 kHz | 48 kHz |
The 88.2 kHz row is the surprise. 88.2 is exactly twice 44.1, the rate most music ends up at, and ffmpeg still picked 48 kHz. If your session ran at 88.2 kHz and the destination expects 44.1 kHz, say so explicitly with -ar 44100.
Bit depth: gone, by design
MP3 has no bit depth. ffmpeg hands LAME 16-bit, 32-bit, or floating-point samples, the encoder stores a compressed frequency representation, and the decoder outputs whatever sample format the player asks for. So there's no need to bounce a 24-bit master down to 16-bit before converting; give ffmpeg the 24-bit file directly. It's also why converting the MP3 back to a 24-bit WAV doesn't recover anything.
Channels: 5.1 becomes stereo, and the LFE vanishes
LAME, the encoder ffmpeg uses for MP3, supports mono and stereo only. Hand ffmpeg a 5.1 WAV and it downmixes automatically. To see exactly what that does, here are 5.1 test files with a tone in one channel at a time, each converted to MP3 at 192 kbps and measured:
| Tone placed in | WAV peak | MP3 left | MP3 right |
|---|---|---|---|
| Front left | −18.1 dB | −25.9 dB | silent |
| Center | −18.1 dB | −29.0 dB | −29.0 dB |
| Surround left | −18.1 dB | −29.0 dB | silent |
| LFE (subwoofer) | −18.1 dB | silent | silent |
Two things to notice. The whole mix drops by 8 to 11 dB, because the downmix scales channels down to avoid clipping when they're summed. That scaling only applies to 16- and 24-bit WAVs; a 32-bit float 5.1 WAV is summed at full level, and a float test file peaking at −1.2 dBFS came out at +6.2 dBFS. And the LFE channel is discarded completely. For a film mix or game audio where the low end lives in the subwoofer channel, the stereo MP3 will sound thin. If that matters, write the downmix yourself with the pan filter so you control where the LFE goes and how loud the result is.
Loud WAV files can clip after conversion
A WAV mastered close to 0 dBFS can clip once it's encoded to MP3, because lossy encoding changes the waveform and lets new peaks overshoot full scale. The WAV's sample peak doesn't predict this; its true peak (the peak between samples) is a better guide, though low bitrates can overshoot even that.
To test it, a synthetic 60-second "loud master" was built: dense, limited, and hard-clipped at a sample peak of −0.1 dBFS, with an integrated loudness of −7.6 LUFS and a true peak of +1.0 dBTP, in the range of heavily limited pop and EDM masters. It was encoded at three bitrates, decoded each MP3 back to 32-bit float, and counted samples over full scale:
| MP3 bitrate | Decoded peak | Samples over 0 dBFS |
|---|---|---|
| 128 kbps | +1.71 dBFS | 818 |
| 192 kbps | +1.06 dBFS | 778 |
| 320 kbps | +0.59 dBFS | 1,208 |
Decoding the same MP3s to 16-bit WAV pinned essentially the same samples at the 16-bit maximum (818, 778, and 1,212). Clipped samples like these can be heard as crackle on transients. The orchestral recording, which peaks around −1 dBFS and has far more dynamic range, produced zero overs at every bitrate.
The fix is headroom before encoding:
ffmpeg -i master.wav -af "volume=-2dB" -c:a libmp3lame -b:a 192k output.mp3
On the loud test file, −1 dB was enough at 320 kbps (0 overs), but 128 kbps still had 14 overs. With −2 dB, both were clean. That lines up with the AES streaming loudness recommendation (TD1004.1.15-10), which recommends that peaks not exceed −1.0 dBTP to prevent clipping with lossy encoders, and notes that lower bitrate coders tend to overshoot peaks even more. To check your own file, ffmpeg -i master.wav -af ebur128=peak=true -f null - prints its true peak.
Metadata carries over, including notes you forgot
ffmpeg copies WAV metadata into the MP3's ID3 tag by default. That includes standard fields like title and artist, but also Broadcast WAV fields and free-text comments your DAW or recorder wrote. A test WAV tagged with a title, artist, a comment reading "take 3, final mix", and a BWF originator reference was converted with the plain command. Every field showed up in the MP3:
$ ffprobe -v error -show_entries format_tags -of compact tagged.mp3
format|tag:originator_reference=USABC123|tag:time_reference=0|tag:artist=Musopen Symphony
|tag:comment=take 3, final mix|tag:date=2012|tag:genre=Classical|tag:title=Figaro Overture
|tag:album=Musopen Kickstarter Project|tag:encoded_by=Pro Tools|tag:encoder=Lavf62.12.103
Handy for a music library, less so for a file you're sending out. Two flags handle it:
# Drop all source metadata (ffmpeg still adds its own encoder tag)
ffmpeg -i input.wav -map_metadata -1 -c:a libmp3lame -b:a 192k output.mp3

# Write ID3v2.3 instead of the default v2.4, for older car stereos and players
ffmpeg -i input.wav -id3v2_version 3 -c:a libmp3lame -b:a 192k output.mp3
ffprobe can print the same information as JSON with -of json, which is easier to scan in a JSON viewer when a file has a long tag list. Put the before and after side by side in a diff viewer and you can see exactly which fields survived.
Why the MP3 starts with 25 ms of silence
Every MP3 encoded by LAME starts with a short block of encoder delay, from the codec's filter bank and look-ahead, and ends with padding, because MP3 works in fixed-size frames. Converting a 1.000-second WAV produced an MP3 whose raw audio was 46,080 samples long, 1,980 more than the original 44,100. The tone started 1,105 samples in, about 25 ms of silence at 44.1 kHz.
You usually don't hear it. ffmpeg writes a Xing/LAME info frame at the start of the file (write_xing defaults to true) that records the delay and padding, and decoders that read it trim both. Decoding that MP3 with ffmpeg returned exactly 44,100 samples.
Things that don't read the header still see the gap: some players, MP3 files joined end to end with cat, and the same file encoded with -write_xing 0, which decoded to the full 46,080 samples. That's why a looping sound effect or a live album split into tracks can click or pause at the joins. For short UI sounds and seamless loops, keep the WAV or use a format with reliable gapless handling, such as Ogg Vorbis or Opus.
Batch convert a folder of WAV files
To batch convert WAV to MP3, loop over the files and run the same ffmpeg command on each one. In bash or zsh (macOS, Linux, WSL):
for f in *.wav; do
  ffmpeg -n -i "$f" -c:a libmp3lame -q:a 2 "${f%.wav}.mp3"
done
In PowerShell on Windows:
Get-ChildItem *.wav | ForEach-Object {
  ffmpeg -n -i $_.FullName -c:a libmp3lame -q:a 2 ($_.BaseName + ".mp3")
}
The quotes around "$f" matter for filenames with spaces, and -n makes ffmpeg skip any MP3 that already exists instead of overwriting it, so a rerun after an interruption doesn't redo finished files. Delete the MP3 that was in progress first; it's truncated, and -n would skip it too. Add -map_metadata -1 or -af "volume=-2dB" from the sections above if your batch needs them.
Converting MP3 to WAV
Converting MP3 to WAV decodes the compressed audio back to uncompressed PCM. It makes the file about 4 to 11 times larger and restores none of the detail the MP3 encoder discarded. The 9.64 MB 320 kbps MP3 from the bitrate table became a 42.5 MB WAV, the same size as the original and no closer to it in quality.
You'd still do it for compatibility. Some audio editors, hardware samplers, and older broadcast systems only import WAV, and many speech-to-text pipelines expect 16 kHz mono PCM:
# Standard 16-bit WAV
ffmpeg -i input.mp3 -c:a pcm_s16le output.wav

# 16 kHz mono, a common speech recognition input format
ffmpeg -i input.mp3 -ar 16000 -ac 1 -c:a pcm_s16le output.wav

# 32-bit float, if the MP3 might decode above full scale
ffmpeg -i input.mp3 -c:a pcm_f32le output.wav
The last line connects to the clipping test. A loud MP3 decodes to samples above 0 dBFS, and a 16-bit WAV can't store them, so they're clipped during the conversion. A 32-bit float WAV keeps them intact, so you can turn the gain down in an editor afterwards without baking in the distortion.
And never use a round trip as an archive. WAV to MP3 to WAV gives you a large file with MP3 quality and no label saying so. Keep the original WAV, or a FLAC of it. FLAC is lossless; the 42.5 MB test WAV compressed to 19.9 MB.
Online converters and your recordings
An online WAV to MP3 converter usually uploads your full recording to someone else's server before converting it. For a royalty-free song, that hardly matters. For a customer interview, a meeting recording, a voice memo, or an unreleased track, you're handing over the complete audio plus whatever is in its metadata.
A deletion policy is a promise you can't verify from the outside. Converting locally, with ffmpeg or a desktop app, keeps the recording on your machine. The broader argument is in why offline developer tools matter.
Converting WAV to MP3 in SelfDevKit
SelfDevKit's Audio Converter runs FFmpeg with LAME on your own machine, so the conversion works without an internet connection and the file never leaves your computer. The details worth knowing before you use it:
- Settings: High = 320 kbps, Medium = 192 kbps (the default), Low = 128 kbps, all CBR. There's no VBR option; use the ffmpeg command above if you want V2.
- No resampling or channel flags are added, so the silent changes above apply. A 96 kHz WAV becomes a 48 kHz MP3 and a 5.1 WAV becomes stereo without its LFE.
- Metadata is kept, because nothing strips it. Check tags before sharing a converted file outside your team.
- Reverse direction: choose WAV as the output format to convert MP3 to 16-bit PCM WAV. FLAC, M4A, AAC, and OGG are also available as outputs. Inputs include WAV, MP3, FLAC, M4A, AAC, OGG, WMA, and AIFF.
- One file at a time. For a folder, the batch loop is faster.
- FFmpeg must be available. The Audio Converter uses an FFmpeg binary that SelfDevKit downloads (roughly 20 to 115 MB, depending on your OS) the first time you convert a video in the Video Converter, or one already on your PATH. Once FFmpeg is present, conversions run fully offline.
- The whole file is loaded into memory for conversion. That's fine for songs, voice notes, and interview recordings. Multi-hour 24-bit sessions are better handled by the ffmpeg CLI.
Converted files get a generated, timestamped name rather than your original filename, so converting twice never overwrites a result, but you'll want to rename the MP3 before sharing it. The same app handles video too; the MOV to MP4 guide and MKV to MP4 guide cover that side.
If you convert the occasional recording and would rather not upload it anywhere, download SelfDevKit for Windows, macOS, or Linux and convert WAV to MP3 locally, alongside 50+ other developer tools. For VBR, a custom downmix, or a hundred files at once, the ffmpeg commands above are the same encoder with every flag exposed.